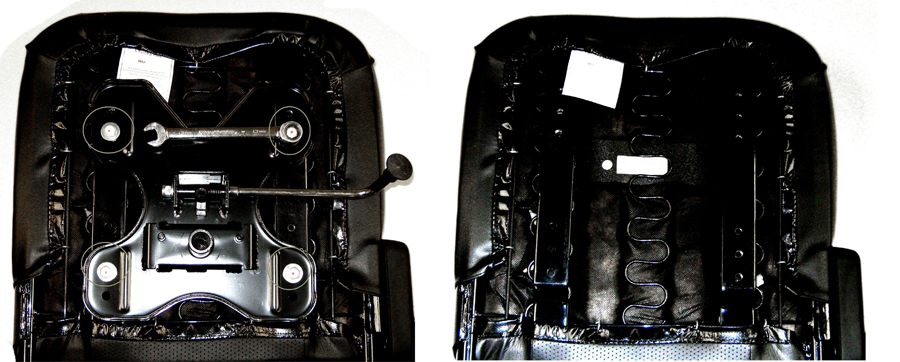
1. Using a 13mm wrench or socket remove the seat plate from the seat.
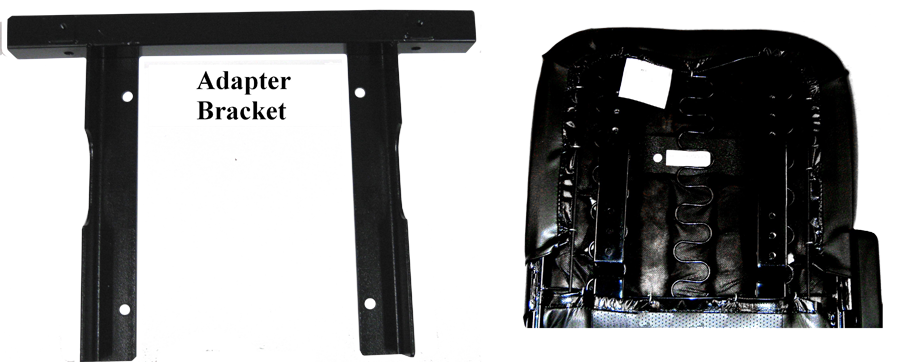
2. Place the adapter bracket (ECELR-
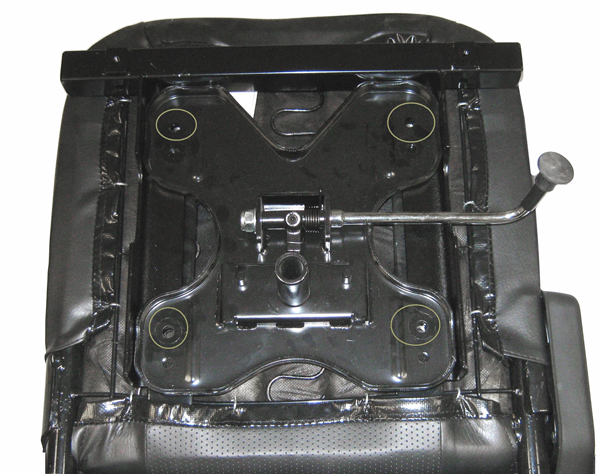
3. Place the seat plate on top of the adapter bracket. Align the holes in the seat bracket, the adapter bracket and the seat. Install the four bolts that were removed in step 1 using a 13mm wrench or socket.
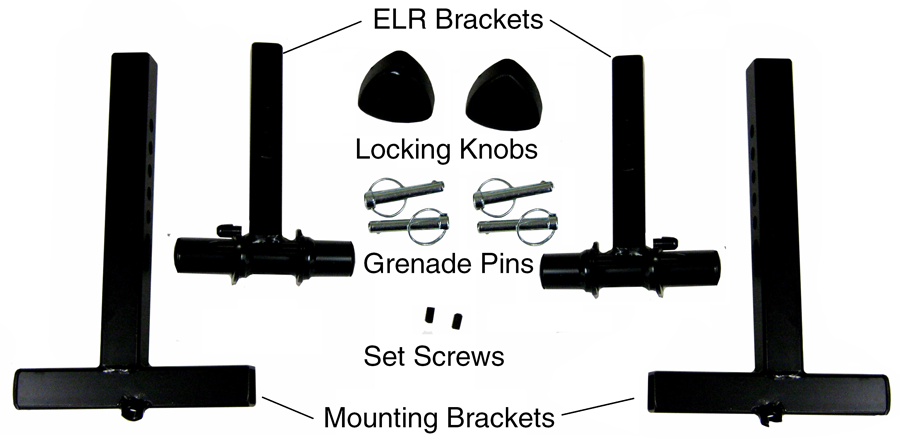
4. Identify the parts in the SFELF kit.
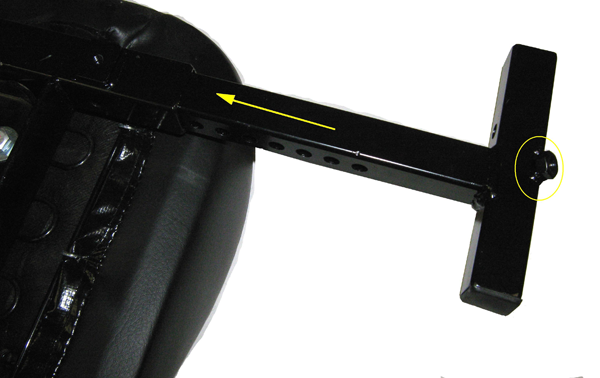
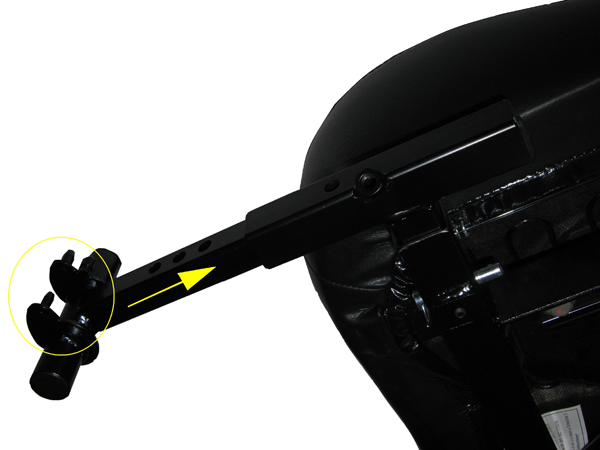
5. Slide the mounting bracket into the adapter bracket. The welded on nut is facing down towards the floor.
6. Align one of the holes in the mounting bracket with hole in the adapter bracket.
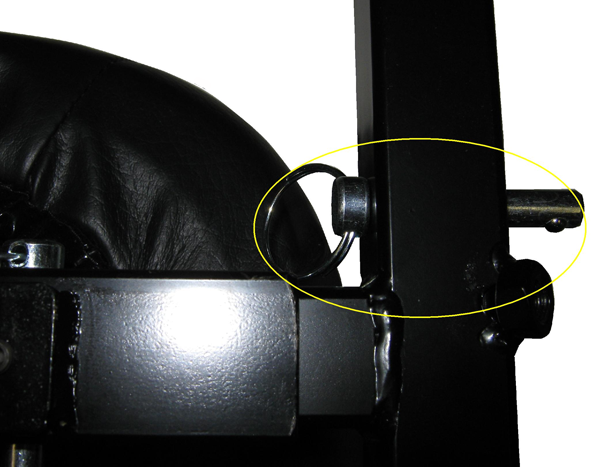
7. Insert one of the grenade pins through the adapter bracket and mounting bracket.
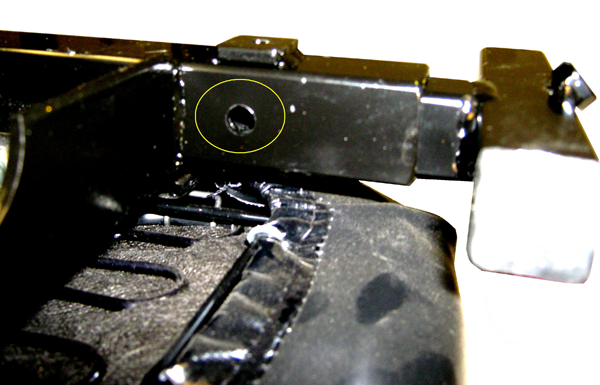
8. Insert one of the Allen head set screws into the adapter bracket.
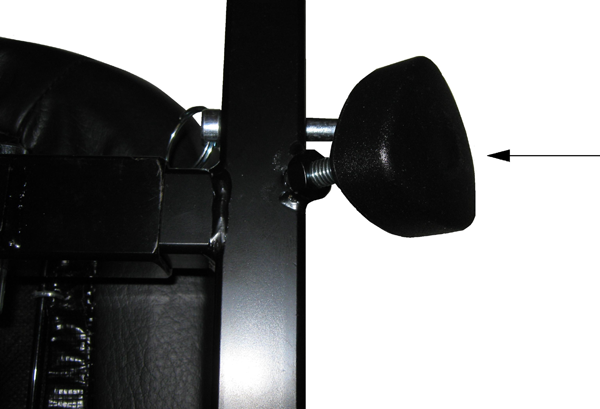
9. Using a 3mm Allen wrench tighten up the set screw.
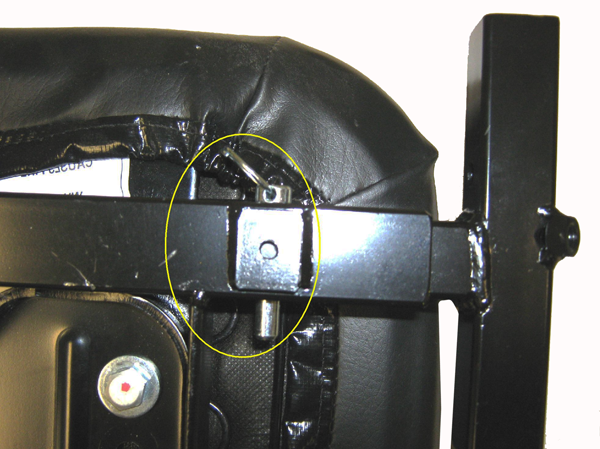
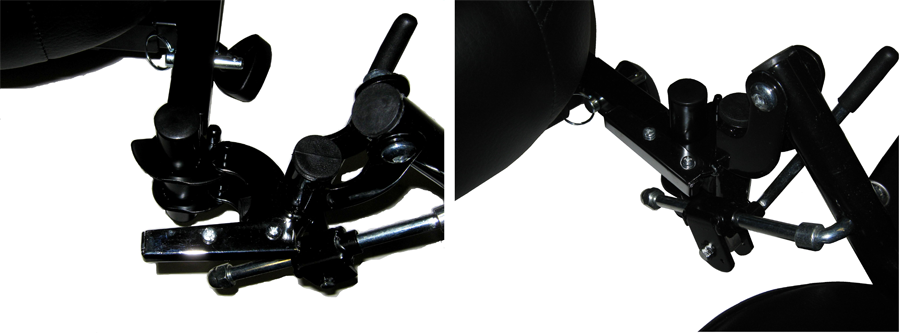
10. Slide the ELR bracket into the mounting bracket. The mounting pins on the ELR bracket have to be on the out side of the seat and facing upwards.
11. Align the hole in the mounting bracket with one of the holes in the ELR bracket. Insert one of the grenade pins.
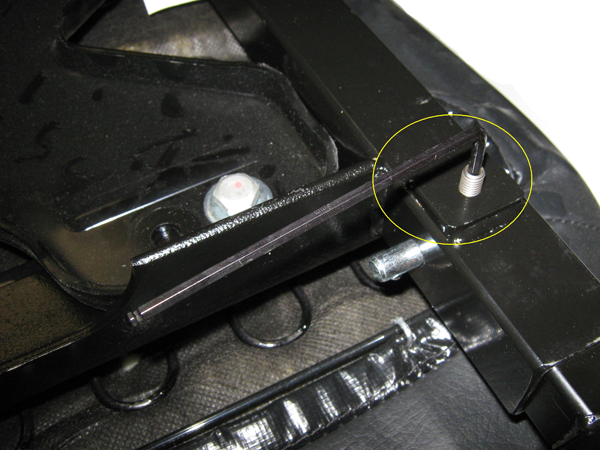
12. Install one of the locking knobs into the nut welded on the mounting bracket. Tighten the knob until the ELR bracket is locked into place. Repeat steps 5 to 12 for the other side.
13. Install the ELR (LK3JELR) in the normal way.
The width between the ELRs can be adjusted by loosening the Allen set screws and removing the grenade pins from the adapter bracket and then repositioning the mounting brackets. The distance of the ELRs from the front of the seat can be adjusted by loosen the adjustment knob and removing the grenade pin from the mounting bracket and then repositioning the ELR brackets.

 Home
Home