
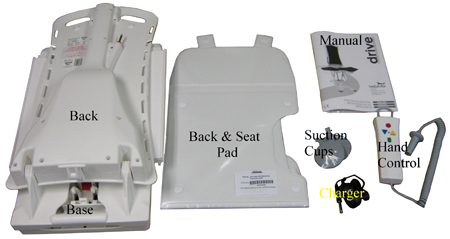
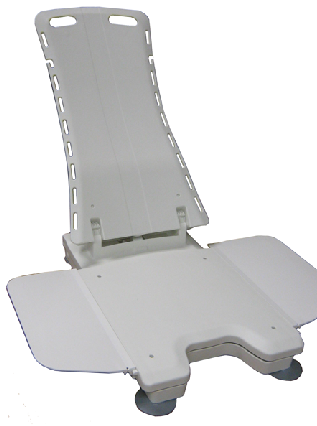
1. Verify that all the parts are present.
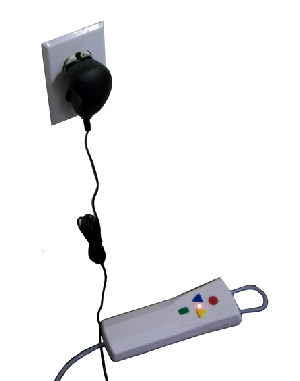
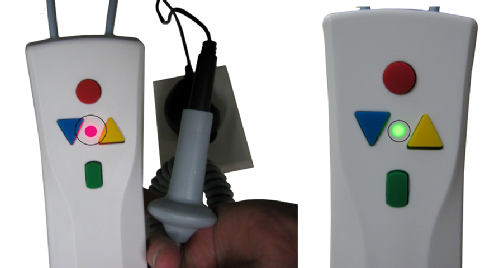
2. Before first use the battery has to be charged. The battery is located in the hand control. Plug the charger into the hand control. Make sure the plug is in all the way.
3. Plug the charger into an AC outlet.
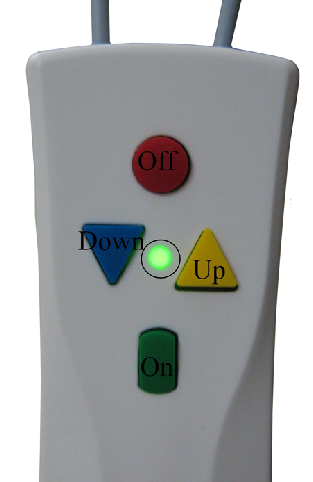
4. The light on the hand control will be red and turn green when finished. This will take about four hours. A charge will last up to six cycles depending on the weight of the person and condition of the battery. By charging the battery after each use the battery will be maintained at its fullest potential.
For screw in suction cups follow steps 5 to 7. For slide in suction cups follow steps 8 to 10.
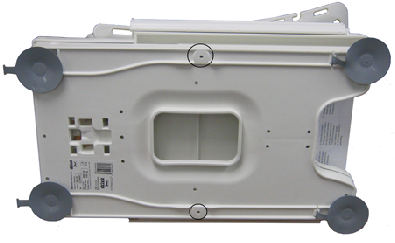
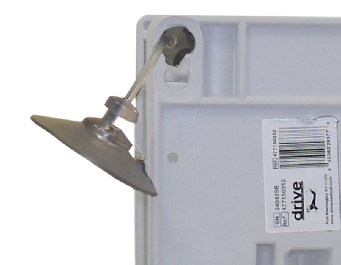
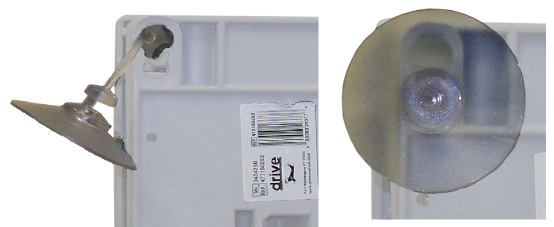
5. Install two of the suction cups to the front underside of the unit. Press the tongues of the front suction cups into the provided recesses in the base plate.
6. Install two of the suction cups to the rear underside of the unit. The tongues of the rear suction cups must be directed away from the unit.
7. Two additional suction cup locations are available on the base of the unit if needed. Additional suction cups are available from your dealer.
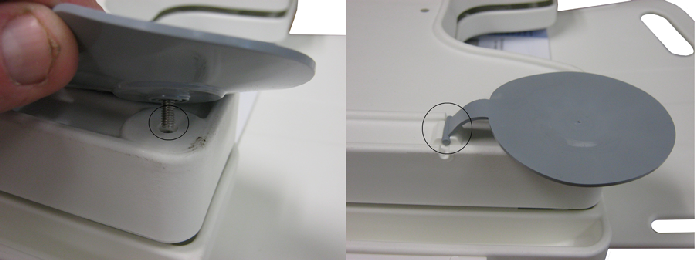
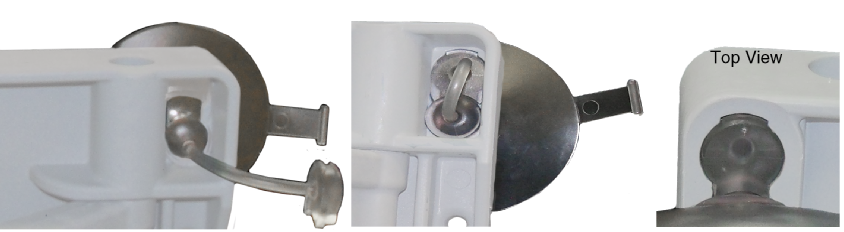
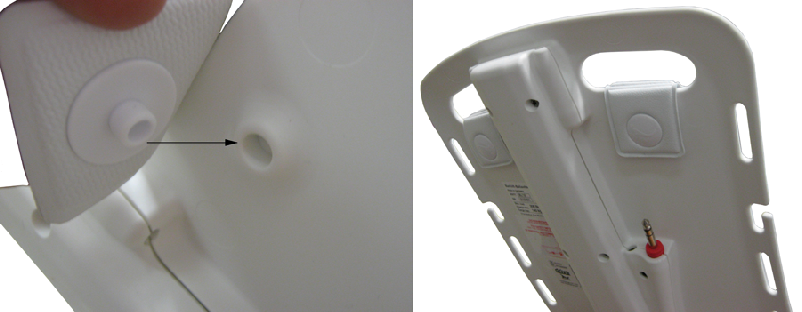
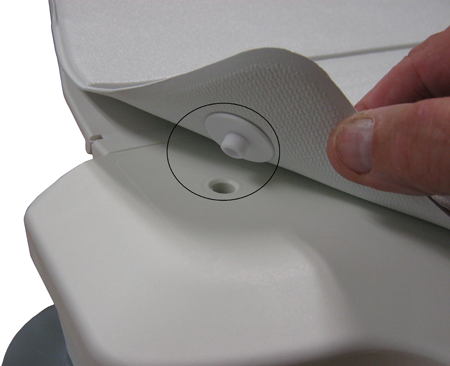
8. Slide securing tab through mounting hole.
9. Slide suction cup into the large hole and push down suction cup into the smaller hole.
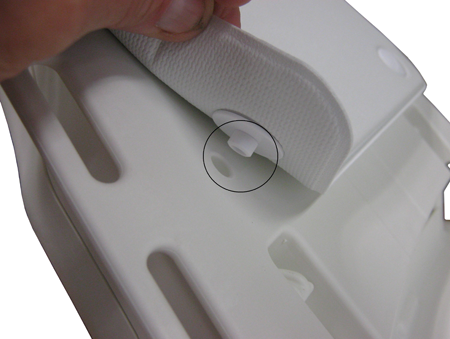
10. Push the locking tab into the large hole to secure the suction cup into place. Repeat for the three additional suction cups.
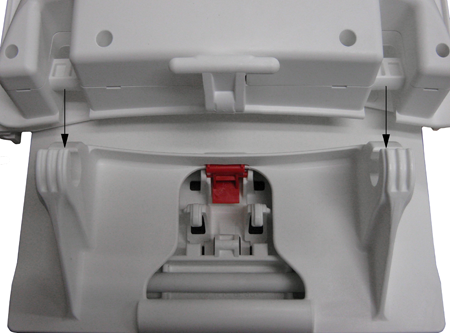
11. Insert the backrest of the unit into the bearing blocks of the seat.
12. Make sure the lifting rod is positioned correctly in the base as the back is tilted rearward.
13. Tilt the back reward as far as possible.
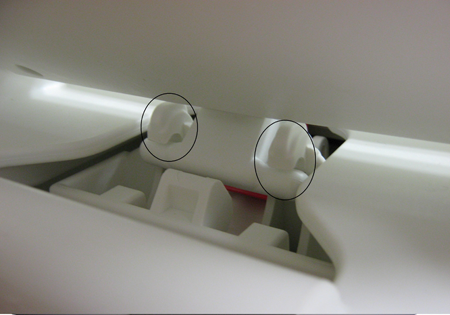
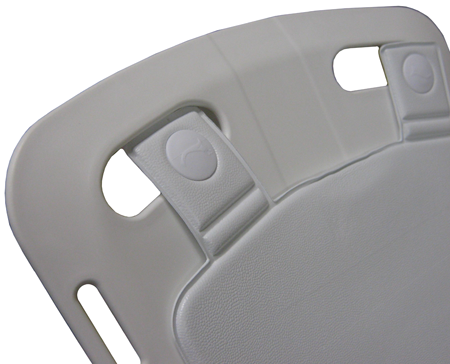
14. Slide the two upper tabs of the backrest cover through the holes provided on the top of the backrest.
15. Align one of the locking buttons on the tabs with the corresponding button receiver in the backrest and push in. Repeat for the locking button on the opposite side.
16. Align one of the locking bottom buttons of the backrest cover with the corresponding button receiver in the backrest and push in. Repeat for the locking button on the opposite side.
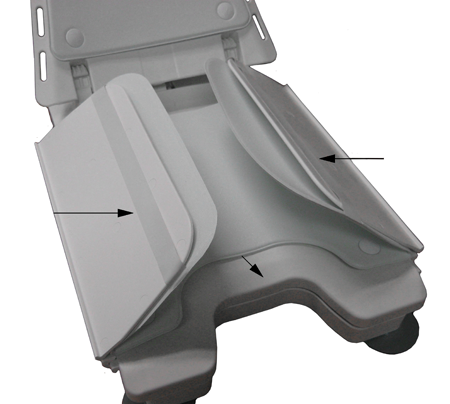
17. Slide the wings of the bottom cover over the wings of the seat. Make sure the cut out of the cover is in the same direction of the cut out of the seat.
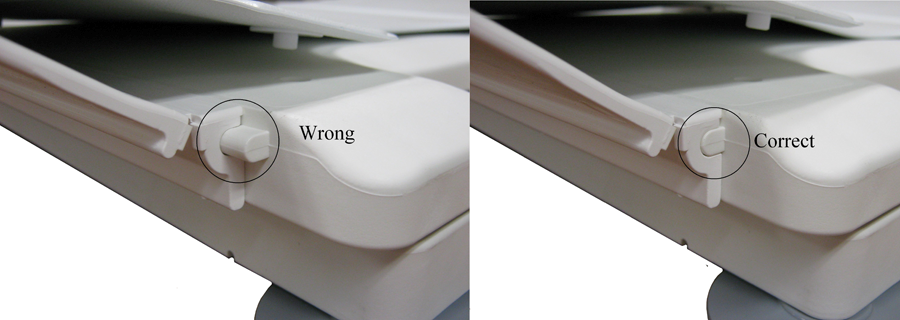
18. Before the locking buttons on the seat cover can be engaged the wings of the seat must be pushed forward. If they are not the locking buttons will not line up with their receiving holes.
19. Push in the locking buttons on the seat cover.
20. After the battery is fully charged disconnect the battery charger. Plug the hand control into the rear of the backrest. Make sure the plug is fully engaged.
21. The unit is ready to be used. Turn the unit on by pushing the green button on the hand control. To bring the unit up, push the yellow button and to bring the unit down, push the blue button. Push the red button to turn off the unit. If the unit is left on for more then 30 minutes it will automatically shut off.
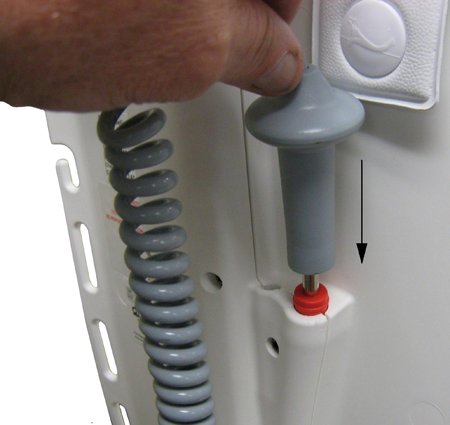
22. If the back is to be removed for easy transportation the lifting rod must be fully retracted. If it is not when it is separated use the hand control to fully retract the lifting rod.
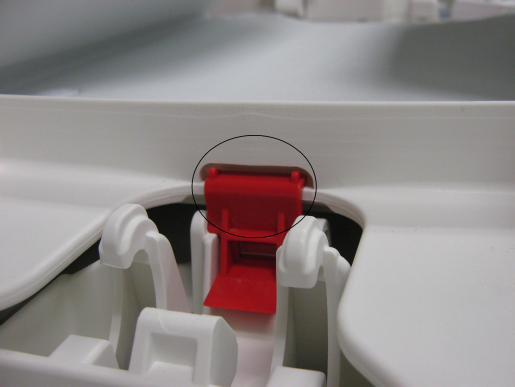
23. When transporting the base of the unit make sure the seat locking latch is engaged.


 Home
Home