
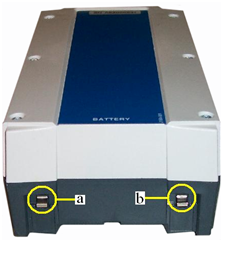
1. Charge the battery for 4 to 6 hours. Unplug the charger and remove the battery pack. Set the multi-
Take a voltage reading to verify that the battery is fully charged. Put the test leads on points a and b. The multi-
read between 24 and 27 volts
2. If the battery voltage is less than 24 volts after charging then battery is at fault.
3. Reinstall the battery in the lift. Unplug the motor and hand control.
4. Set the multi-
5. Put one lead of the multi-
6. Have someone push the up button. The multi-
circuit (a reading).

7. Put one lead of the test meter on tip #1 and the other on tip #3. Have someone push the down button. The multi-
reading should go from an open circuit (no reading) to a closed circuit (a reading).
8. If both the up and down functions test good then the problem is in the charger/controller or motor.
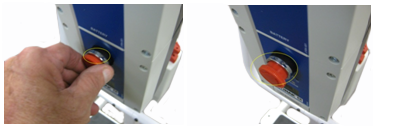
9. Verify that the emergency stop button is not pushed in. If the emergency stop button is pushed in, turn the button
to reset it to the out position. The emergency stop button has to be in the out position for the lift to operate.
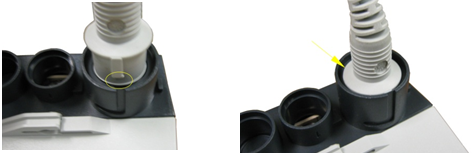
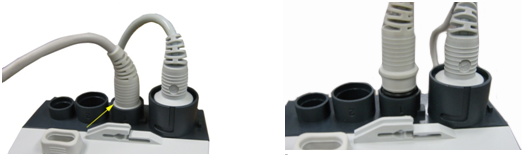
10. Align the tab on the plug of the hand control with the indent in the hand control socket. The plug must be pushed in
flush with the controller. When the plug is flush with the controller the top of the plug will be below the lip of the socket. If
there is any difficulty when inserting the plug a very small amount of petroleum jelly on the rubber O ring is required.
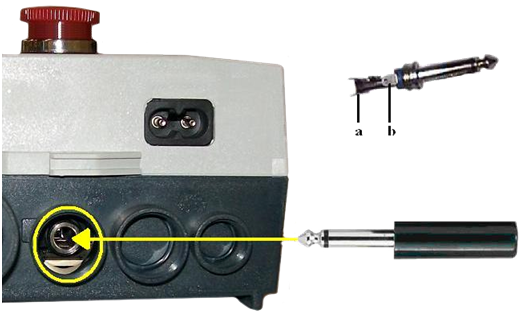
11. Insert a 1/4” mono audio plug (Radio Shack #274-
Remove the barrel of the plug to get access to the contacts. Attach one test lead of the test meter to each of the
contacts (a & b). Take care not to allow the leads to touch each other.
12. Have someone press up button on the hand control. You should hear a click and the meter should show the same
voltage previously read on the battery.
13. Have the down button pressed on the hand control. You should hear a click and the meter should show the same
voltage previously read on the battery, but the polarity will be reverse. If the click is heard in steps 12 and 13 and there is
no or very little output voltage then the problem is in the charger/controller and it should be replaced.
14. If the output voltage in steps 12 and 13 are the same as or close to step 1, then plug for the connector for the motor
actuator cable into small round socket on the controller. The plug must be pushed in flush with the controller. If there is any
difficulty when inserting the plug a very small amount of petroleum jelly on the rubber O ring is required.
15. Push the up and down function on the hand control. If the motor does not respond properly, then the problem is the motor and it should be replaced.